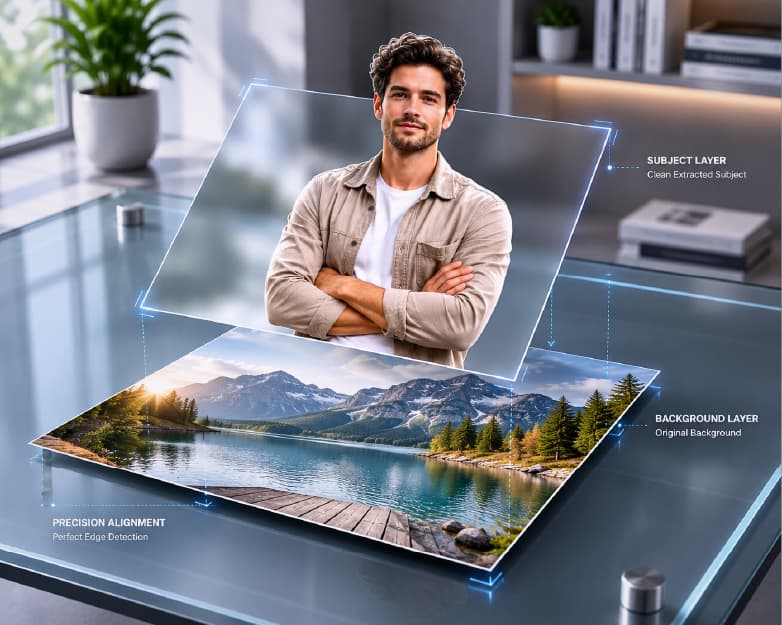
How to Remove the Background from an Image for Free (No App, No Photoshop)
The quickest method to get rid of a background in your image is to upload the image to an online background remover tool, allow it to recognize the object automatically, and then download the result in a transparent PNG format – all of which can be done in less than ten seconds without any design expertise and even without having Photoshop installed on your computer. But that's the short answer. If you need a long one, then it would depend on the intended use of the resulting image because "background removal" may mean quite different things for a passport photo or for a product shot or for a logo, and choosing the incorrect output format is the number-one mistake in this process. This guide covers the full picture: how AI background removal actually works, when you want a transparent background versus a plain white one, how to handle the specific cases that trip people up (hair, glass, shadows, low-resolution photos), and the different use cases - passport photos, e-commerce product shots, logos, signatures, profile pictures - that each have their own best practices.
What "Removing the Background" Actually Means
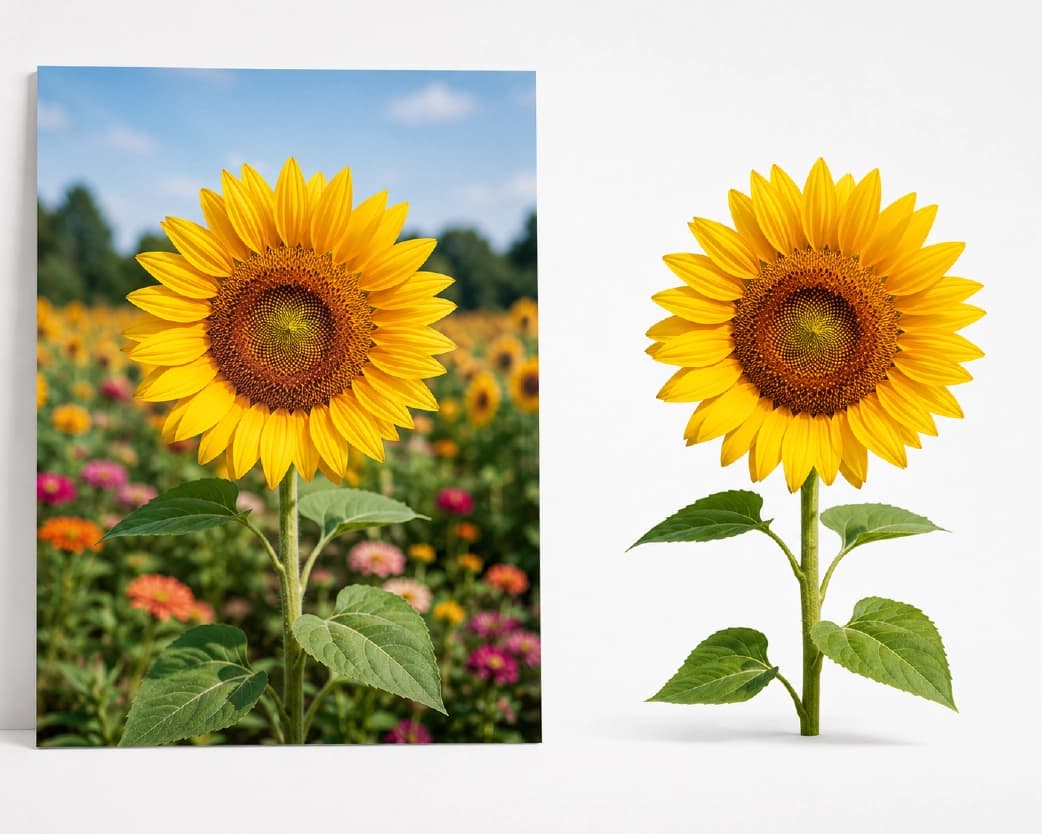
To put it succinctly, the process of background removal from an image is nothing but segmentation of the object from the image (person, product, shape of the logo) and elimination of the background of the image (background being either deleted or replaced by another background, be it clear or a particular color). However, to make the deleted background invisible (i.e., to see through), the file format should provide for the possibility of transparency; hence, background removal software tends to save files as PNG rather than JPG as the latter does not provide for transparency; thus, it is impossible to remove the background of a JPG file.
Most modern background removers, including AI-powered ones, work by identifying the boundary between the main subject and the background using a trained model rather than requiring you to manually trace an outline. This is what "AI background remover" and "auto background remover" refer to in search terms - it's now the standard approach, distinct from the manual selection-tool method photo editors used for years, where a person had to click around the subject's edges by hand. The AI approach handles most photos in a single pass with no manual work at all, though certain edge cases (covered further down) still benefit from a manual touch-up.
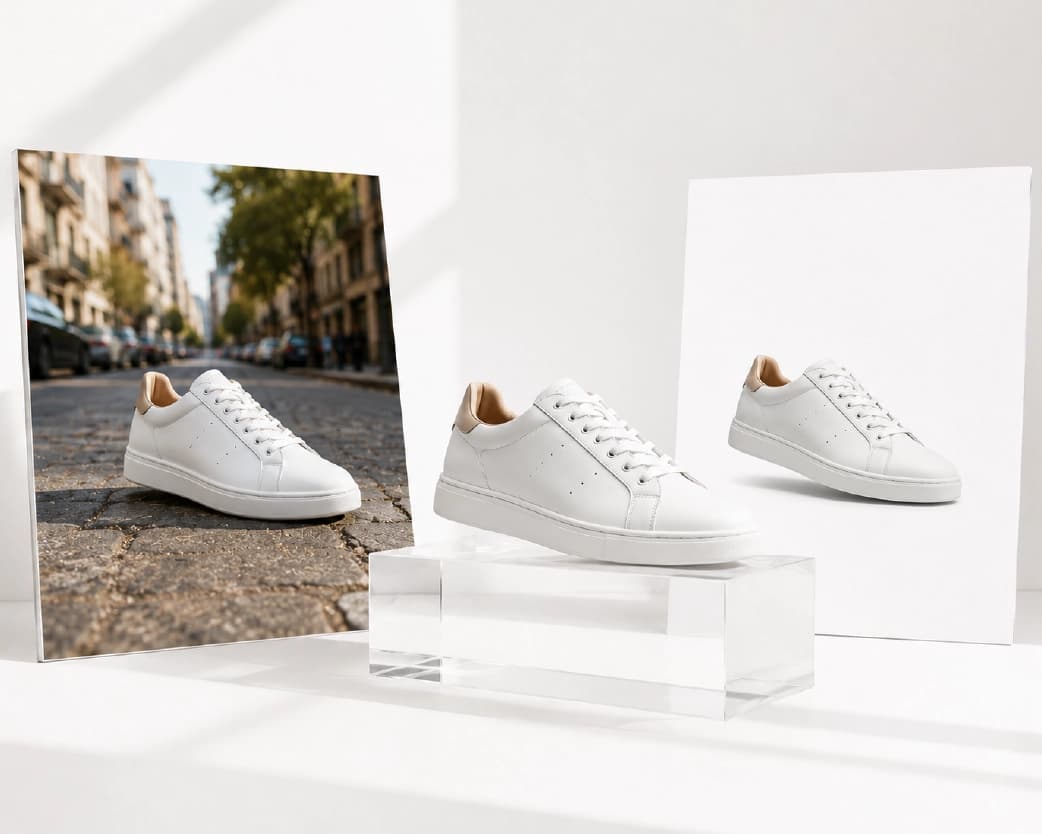
Step-by-Step: Removing a Background Online, Free
Using Plainscan's background remover:
- Upload your image. JPG, PNG, or most common image formats work as input regardless of what you want the output format to be.
- Let the tool process it automatically. The AI detects the subject and generates a cutout - for most straightforward photos (a person against a plain wall, a product on a table, a logo on a solid color) this happens without any manual adjustment needed.
- Check the edges. Zoom into areas with fine detail - hair, fur, semi-transparent material - since these are where automatic detection is most likely to need a touch-up, covered in more detail below.
- Choose your output. Download as a transparent PNG if you want the subject isolated with no background at all, or apply a solid color (commonly white) if the end use requires a plain background rather than transparency.
- Download the finished file. No account is required for occasional use.
That's the entire core workflow. The sections below go deeper into the decisions that actually determine whether the result looks professional.
Transparent vs. White Background: Choosing the Right Output
This is the decision more people get wrong than any other part of this task, because "remove the background" gets used loosely to describe two genuinely different outcomes.
A transparent background means there's literally nothing behind the subject - when you place the image on top of another design, a colored page, or a different photo, whatever's underneath shows through around the subject's edges. This is what you want for logos (so they sit cleanly on any color website header), for graphic design elements, for stickers, for anything that's going to be layered onto something else. A transparent background only exists meaningfully in file formats that support an alpha channel - PNG is the standard choice; WebP also supports it, but PNG remains the most universally compatible.
A white (or solid-color) background means the subject is isolated and then placed onto a flat, uniform backdrop rather than left transparent. This is what most e-commerce platforms actually require - Amazon's product photo guidelines, for example, call for a pure white background on the primary listing image, not transparency, because their display system doesn't composite transparent PNGs the way a design tool would. Passport and ID photos work the same way: government photo specifications almost universally require a specific solid background color (usually white or light gray), not transparency, since the photo needs to look identical and printable regardless of what it's placed against.
The practical rule of thumb: if the image is going to be layered into a design (a logo, a graphic element, a sticker, a composite photo), go transparent. If the image is going to stand alone as a finished photo somewhere with formatting requirements (a product listing, an ID photo, a printed document), go white or whatever solid color the destination specifies. Getting this backwards is why some product photos end up rejected by marketplace listing checks, and why some "transparent" logos actually still have a visible white box around them - the creator picked white when they needed transparency.
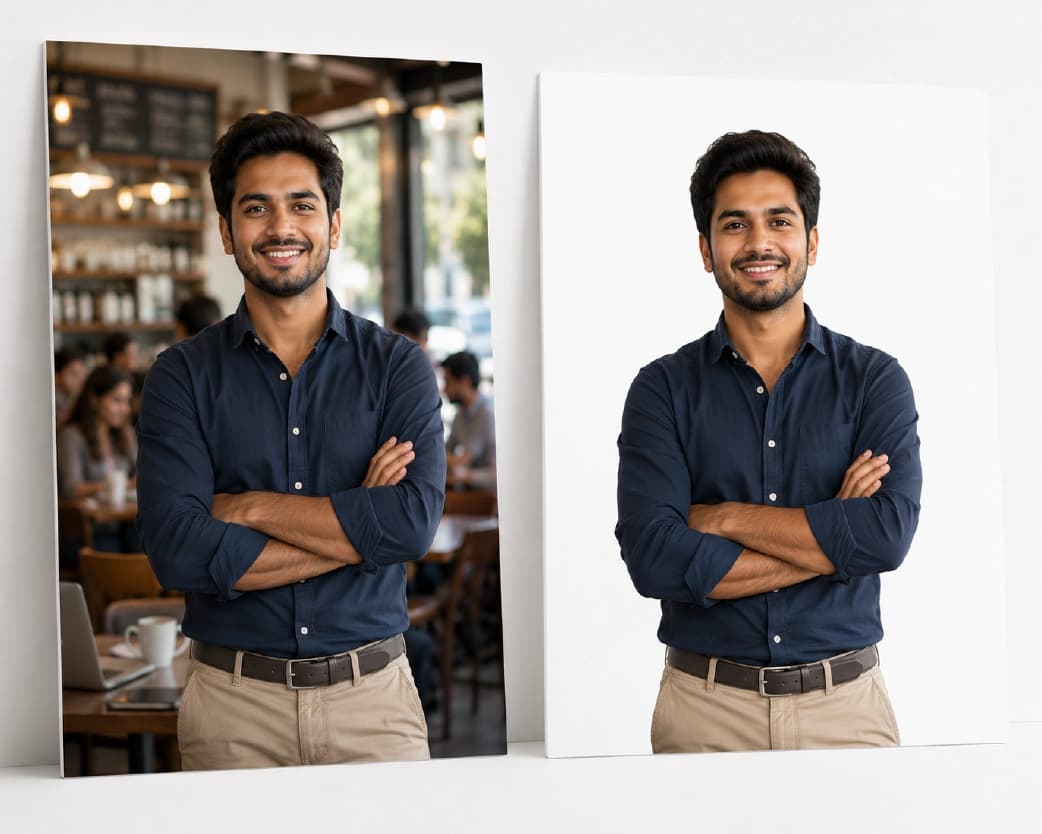
Removing Backgrounds for Specific Use Cases
Passport and ID Photos
Passport, visa, and ID photos have strict, specific background requirements that vary by country and document type - usually a plain white or light gray background, even lighting with no shadows behind the subject, and precise dimensions. A general-purpose background remover gets you the isolated subject, but for these specific documents, using a dedicated passport photo tool is worth it over a generic background remover, since it accounts for the sizing and background-color specifications together rather than leaving you to add a compliant background and crop to spec manually afterward.
Product and E-Commerce Photos
Product photography is one of the highest-volume real-world uses for background removal - a photo shot in a warehouse or on a cluttered desk needs a clean, consistent background before it can go on a storefront. The standard approach: remove the background entirely to isolate the product, then apply a pure white (or brand-consistent) background rather than leaving it transparent, since most marketplaces and storefronts expect a filled background on the primary image. For photos of glossy or reflective products (glass, metal, jewelry), pay close attention to the edges after processing - reflective surfaces are one of the harder cases for automatic detection, covered in the troubleshooting section below.
Logos
Removing the background from a logo - turning a logo that was saved with a white box around it into a clean transparent PNG - is one of the most common individual use cases, and one of the simplest, since logos are usually high-contrast, flat-color graphics with clean edges, which is close to the ideal case for automatic background detection. The output should almost always be transparent PNG, not white, since a logo needs to sit cleanly on whatever background color the website, document, or merchandise it's placed on actually uses.
Signatures
Scanned or photographed signatures typically come with a white or off-white paper background that needs to be removed before the signature can be layered onto a digital document or form. Because a signature is essentially just dark ink strokes on a light background, this tends to process cleanly with automatic detection - the higher-risk failure mode is a signature written in a light-colored or gel pen, which can confuse the subject-versus-background detection since there's less contrast for the tool to work with. A dark, high-contrast pen on plain paper gives the most reliable result.
LinkedIn Photos, Headshots, and Profile Pictures
Replacing a messy or unsightly background behind the headshot image is another typical request for LinkedIn headshots, and it suits background removal technique well, although in most cases, it would be preferable to use some kind of replacement background rather than make the image completely transparent, because a head-and-shoulder image without a background may look somewhat odd on the plain platform background. In case the goal of the image is a professional looking headshot, replacing the background and adding some soft background color (navy, gray or some other subdued color) will look better than the totally transparent one.
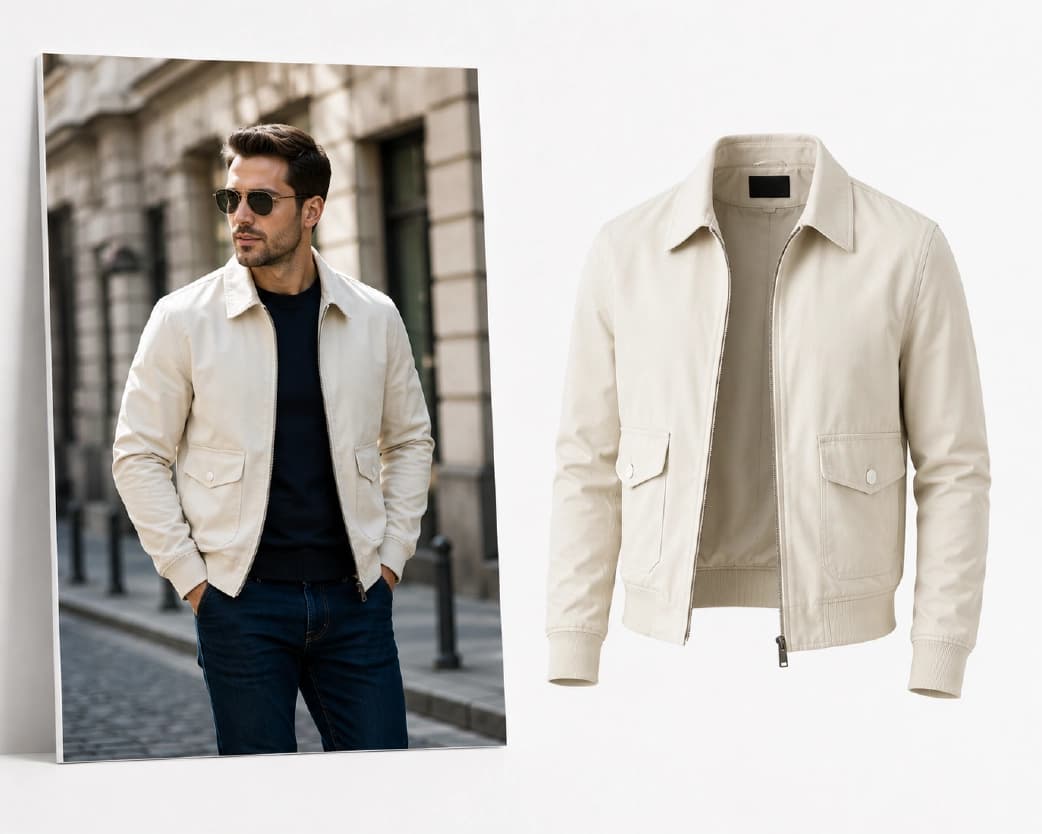
Do You Need an App, or Does a Browser Tool Work?
A significant share of people searching for background removal are specifically looking for a mobile app, which makes sense - most background-removal needs originate from a phone photo. The good news is a dedicated app usually isn't necessary: a browser-based background remover works identically on a phone's browser as it does on desktop, without needing to find, install, and grant permissions to a separate app just for an occasional task. The only real advantage a native app offers is being reachable from a share-sheet shortcut for very frequent use - if this is a task you do rarely, opening a browser tab and uploading the photo is no slower than opening a dedicated app, and it doesn't leave a permanent install taking up phone storage for something used once a month.
Bulk and Batch Background Removal
If you're processing more than a handful of images - a product catalog, a set of headshots for a team page, dozens of scanned signatures - doing them one at a time through a single-image upload becomes the bottleneck rather than the background removal itself. For genuinely large batches, check whether the tool you're using supports uploading multiple files in one session rather than one image per session; this matters more here than it does for something like PDF merging, because each image needs its own individual processing pass rather than being combined into one output, so the time savings from batch upload is purely about not re-opening the tool for every single file.
For very large catalogs (hundreds of images), it's worth processing a small representative sample first - a handful of images covering the range of backgrounds and lighting conditions in your actual set - to confirm the automatic results are consistently clean before committing to the full batch, rather than discovering a systematic issue (like a consistent shadow being left behind) after all of them are done.
How AI Background Removal Actually Works (Briefly)
Without getting into implementation specifics that vary by tool, the general approach behind AI background removal is a trained model that's learned to distinguish "subject" from "background" the same way a person visually does - recognizing the shape of a person, an object, or a product, and generating a precise outline (technically called a mask) around it, pixel by pixel. This is different from older, non-AI background-removal methods, which typically relied on the background being a single flat, predictable color (like a green screen), or required a person to manually trace or click around the subject. The advanced AI technology allows processing of images where there is lots of activity and complex backgrounds such as the one where a person is positioned in a normal room, not in front of a green screen since the neural network learns to detect the person rather than the simplicity of the background.
It also explains why some pictures get processed better than others: since it uses its experience and learned patterns, the model will perform well with the pictures where the object and the way it is placed is usual for it (for example, a picture of the person facing the camera, or an image of the product on the table).
Background Removal for Social Media and Thumbnails
Beyond LinkedIn headshots, background removal shows up constantly in day-to-day social media and content work. A YouTube thumbnail featuring a cut-out person reacting to something, an Instagram post layering a product photo over a branded background color, a profile picture with a cleaner backdrop than the original photo - all of these follow the same core process, with the output choice depending on the platform's format. Thumbnails and layered graphics almost always want transparent PNG so the cutout can sit over a designed background; a straightforward profile picture swap is more of a judgment call, similar to the LinkedIn headshot guidance above, where a solid or softly blurred background often looks more natural than stark transparency once it's actually displayed in a circular profile frame.
In relation to thumbnails specifically, one thing to remember is that since most image hosting platforms compress images automatically upon uploading, any fine edge detail will be softened after upload. Although this is not something that is completely controllable at the background removal stage, using a high-resolution cutout as opposed to just meeting the minimum resolution needed on that platform helps lessen the problem.
Working from a Phone Photo vs. a Screenshot
It's worth distinguishing between removing the background from an actual photograph and removing it from a screenshot or a photo of a screen - these are common but meaningfully different source types. A genuine photo (taken with a camera or phone) generally has the lighting, focus, and resolution characteristics the AI model was trained to expect, so it tends to process cleanly. When an image is captured through a screen capture of the image or a photograph of an image on the screen, artifacts of compression, Moire pattern, or glare occur, which are not present in the original image. In case the original image file is available instead of a screen shot or photograph of a photograph of the image, the use of original image would yield a better output, because of the fact that there was no prior degradation of the input itself.
Mistakes Worth Avoiding
- Stripping the background before knowing its use. The difference between transparent and white is explained above, and choosing one of them without finding out what the background is actually going to be used for will inevitably lead to doing the export once again. It takes only a couple of seconds.
- Skipping the zoom-in check on anything with fine detail. A thumbnail-sized preview can look flawless while hiding rough edges around hair, fur, or fine text that only become obvious once the image is placed at full size in its final context - by which point it's often already been sent, posted, or printed.
- Utilizing an image of low resolution due to its convenience. It is always easier to make use of a quick screenshot or an extremely compressed image from the chat conversation. However, as discussed above, it will put limitations on how good your final product will be. Thirty seconds more spent on finding a better quality image will definitely pay off.
- Assuming every image needs identical treatment in a batch. A batch of forty product photos might include a few reflective or complex items among mostly straightforward ones - treating the whole batch identically without a spot-check on the harder cases, as covered in the product catalog example above, is how a handful of bad cutouts end up shipped alongside thirty-five good ones.
Video Background Removal: A Different Task Entirely
Keyword research for background removal may contain references to video background removal, but there's no doubt that it must be explicitly stated that background removal for video and for an image are two completely different tasks. Image background removal requires generation of a single mask, while background removal for video implies generation of masks for each and every frame. That's why background removal software intended for video files is a special kind of software rather than just a universal tool capable of performing background removal for videos and images. Background removal for video files is required when dealing with something like a talking head video, product demonstration, and other videos, not a photo. This guide is meant to help with removal of background from photos and images like photos of products, logos, and similar still images.
Choosing Transparent vs. White at a Glance
| Use case | Suggested output format | Reasoning |
|---|---|---|
| Logo for website/app | Transparent PNG | It needs to fit on any colored background |
| E-commerce listing photo (main image) | Background-colored (usually white) | This is the requirement in most marketplaces when uploading your photos for your listings |
| Passport/visa/ID photo | Background-colored based on the official specifications (usually white or gray) | There are strict requirements regarding passport/visa/ID photos |
| Digital signature | Transparent PNG | It needs to fit on the document that you're signing |
| LinkedIn/professional headshot | Background-colored or slightly blurred background | Transparency would not look natural on LinkedIn page |
| Sticker or design element | Transparent PNG | Same logic as a logo - needs to layer onto other designs |
| Presentation slide graphic | Transparent PNG | Sits over slide backgrounds and other elements without a visible box |
| Print materials (flyers, packaging) | Depends on layout - often transparent if being placed into a designed layout | Print design software composites transparency the same way digital design tools do |
File Formats: What Goes In, What Should Come Out
Background removal tools generally accept whatever common image format you throw at them - JPG, PNG, WebP, even HEIC from an iPhone in most cases - since the input format doesn't need to support transparency; it's only the output that does. With the background stripped out, the result will be PNG in almost all cases due to the very fact that the feature of transparency in the image is enabled thanks to the alpha channel used in PNG. While WebP format can also produce transparent images and is more compact compared to PNG, it can be considered an appropriate format for web purposes in case of its compatibility on the uploading platform – PNG, however, is still a more secure choice since it is supported almost everywhere.
One thing worth knowing: if you upload a JPG and remove its background, the output has to be re-exported as PNG (or another transparency-supporting format) to actually preserve the transparency - the tool isn't "converting" your JPG so much as generating a new file in a format capable of representing what a JPG structurally can't.
A Practical Example: Cleaning Up a Small Product Catalog
To make the batch-processing guidance above more concrete: imagine a small business with forty product photos, all shot on a plain but not perfectly uniform tablecloth background - good enough for reference, not good enough for a professional storefront. The practical workflow looks like this: run three or four representative photos through the background remover first, covering the range of products in the catalog (a matte item, a reflective item, something small, something larger), and check the edges on each before committing to the full batch. If those come back clean, running the remaining photos through in batches (rather than one at a time) and then applying a consistent white background across all of them keeps the final catalog visually uniform - which matters more for a professional appearance than any individual photo being perfect, since inconsistency between listing images is often more noticeable to a shopper than an imperfect edge on any single photo. Photos with reflective packaging or glass components are worth a manual second look afterward, per the troubleshooting notes below, rather than assuming the automatic pass caught everything correctly on the harder cases.
Common Problems and How to Fix Them
- Hair and fur appear jagged or with a sharp border around them. The most difficult detail to remove from the background in either AI-based or manual methods is fine details such as individual hairs, since they are neither completely opaque nor have a clean line border. Modern-day AI software does a much better job than older removal algorithms when processing such images, but even here, an image with overlapping hair in front of a complicated high-contrast background will have more visible artifacts than a picture taken against a simpler background. If the image needs to be used in close-ups, the original should be taken against a simpler background.
- Glass, reflective, or semi-transparent objects lose their transparency. A photographed wine glass or a glass bottle is inherently tricky, because part of what makes the object itself is that you can partially see through it - the tool has to decide whether the "background" visible through the glass counts as background or as part of the object, and there's no universally correct answer. Manual touch-up is often genuinely necessary for this specific case rather than expecting a fully automatic result.
- A slight shadow or outline still exists even after removal. This generally occurs if there was originally a soft shadow cast by the object on the background wall in the picture, and the software detects this shadow to be part of the object itself, because it is technically a different color from the background itself. This problem can be avoided by taking another picture using even lighting.
- There is not enough contrast between the subject and the background. When a white object is photographed against a white background, or a person wearing a white shirt is photographed against a background that is almost identical in color to the shirt, the amount of contrast the image detection algorithm can work with is minimal. This makes it more likely that the cutting process will produce errors, such as cropping a portion of the subject out or leaving parts of the background visible.
- Lower-resolution images, or those that have been highly compressed, exhibit harsh edges. Image segmentation occurs on a per-pixel basis; therefore, an image which is already fuzzy, low resolution, or filled with artifacts due to excessive compression will not provide sufficient details for the algorithm, which results in sharp or rough edges in the output image. Working on the high resolution version of the original image, rather than the one that has been down-sized or compressed, leads to better quality edges.
Free vs. Paid: What You Actually Get on Each Tier
Plainscan's background remover is available on the free plan for everyday, occasional use - up to a limited number of images per day - with the Pro tier offering a substantially higher daily allowance for anyone processing images regularly, like a small business handling ongoing product photography or a team producing headshots at scale. The underlying background-removal quality doesn't change between tiers; what Pro buys is volume, not a better result.
How This Compares to Other Background-Removal Options
People weighing this decision are often comparing a dedicated background-removal tool against a feature buried inside broader design software (Photoshop, Canva, Adobe Express) or against other standalone tools built specifically for background removal. Design-suite tools like Photoshop and Canva do include background-removal features, but they're one feature among dozens in a much larger, often paid, application - reasonable if you're already paying for and using that software for other design work, but a heavier tool than necessary if background removal is the only thing you need done. Standalone background-removal tools, whether Plainscan's or others in the same category, are built around doing this one task well and quickly, without requiring a subscription to a full design suite or a learning curve around unrelated features to get to the part you actually need.
Best Practices for Cleaner Results
- Shoot for high contrast, even if you'll be removing the background. A high-contrast image, in which the subject is distinguishable from the background due to difference in colors, sharpness, or lighting, gives any background removal algorithm a lot more to work with and results in a cleaner output than an attempt to improve a low-contrast image later.
- Start with a high-resolution image. As discussed earlier, edge accuracy depends directly on how many details there are in the image, so beginning with a small, low-res version is going to limit your result from the start.
- Pick transparent or white deliberately, not by default. Given how different the two use cases are (design/layering versus platform-specific requirements), it's worth a five-second pause to confirm which one the destination actually needs before exporting, rather than exporting whichever is the tool's default and discovering later that a marketplace or a design tool rejected the file.
- Zoom in before calling it done. Especially for hair, fur, glass, or fine detail, checking the result at full zoom rather than at thumbnail size catches artifacts that are easy to miss at a glance but obvious once the image is placed into its final context.
Frequently Asked Questions
Is background removal actually free?
Yes, for everyday use. Plainscan's background remover works on a free tier without requiring a paid account, with a Pro tier available for higher daily volume if you're processing images regularly rather than occasionally.
Should I download an application for removing the background from the image?
No, it does not require an installation of any application since the background removal utility is equally functional within your web browser both on a desktop computer and mobile device.
What's the difference between a transparent and a white background?
Transparent means nothing is there at all - whatever's behind the image shows through, which is what you want for logos or design elements being layered onto something else. The definition of White is that the subject is placed against a solid white background since that is the requirement of most e-commerce websites and ID pictures. These are not interchangeable and choosing the wrong one for your particular purpose is often a mistake.
Why do I need to export a PNG?
The need for an alpha channel exists for creating transparency, and PNG contains it while JPG doesn't. PNG format is used for those images where backgrounds are removed because it can create "no background" area without using any color.
Can I remove the background from a logo for free?
Yes - logos tend to be one of the more straightforward cases for automatic background removal, since they're usually high-contrast, flat-color graphics with clean, defined edges.
Why does the AI struggle with my photo's hair or fur?
Fine, semi-transparent detail like individual hair strands is genuinely the hardest case for any background-removal method, since the edges aren't a solid line. Photos with the subject against a simpler, higher-contrast background tend to produce cleaner hair edges than busy or low-contrast originals.
Can I remove backgrounds from multiple images at once?
For batches beyond a handful of images, check whether the tool supports uploading multiple files in a single session rather than one at a time - this saves significant time on genuinely large batches, like a full product catalog.
Will background removal work on a photo I took on my phone?
Yes, phone photos work the same as any other image, though photo quality still matters - a higher-resolution, well-lit original photo produces a cleaner cutout than a blurry or poorly-lit one, regardless of what device it was taken on.
Does removing the background reduce image quality?
The integrity of the subject does not deteriorate due to the removal process since the resolution and clarity remain the same as those of the original image. The only part that might be affected by the quality of the removal process is the precision of the edges of the details.
Can a removed-background picture be used as a passport or visa photograph?
It cannot be directly used via any regular background removal service due to the specific criteria needed for such photographs, like exact colors, lighting, size, etc. This type of photo requires a specialized passport photograph tool to get the best results.
What's the difference between this and Photoshop's background removal?
The underlying goal is the same - isolating a subject from its background - but Photoshop's version is one feature inside a full, often paid, design application built for much broader photo editing work. A standalone browser-based tool is built specifically around this one task, so there's no software to install and no unrelated feature set to navigate through to get to it.
Can I remove the background from a screenshot instead of the original photo?
Yes, but the result usually won't be as clean as working from the original file - screenshots introduce compression and sometimes moiré patterns that make edge detection harder. If the original image file is available, use that instead of a screenshot.
Is a white background the same as a transparent background with white filled in behind it?
Visually, they can look identical in a static image, but they behave differently once placed somewhere else. A true white background is a filled color permanently baked into the image - moving it onto a colored page still shows a white box. A transparent background with nothing behind it lets whatever's underneath show through. If you want the flexibility to place the image anywhere later, transparent is the more versatile choice even if you currently only need it on a white page.
Is the background remover effective for drawings and illustrations rather than photos alone?
Usually yes, but the success rate can be more unpredictable compared to working with photographs, as the software, designed to distinguish between the subject and the background in a photo, could misconstrue stylistic effects used in illustrations (softening, intentional blurring of the outlines), unlike a person would. Illustrations with clear contrasts between simple shapes (all logos) do fine.
What happens if I upload an image that already has a transparent background?
The tool will still attempt to detect a subject and process the image, though there's nothing further to remove if the background is already gone. If you're trying to replace an existing background with white or another color rather than remove one, that's a background-replacement task rather than a removal task, and worth double-checking the tool handles that specific direction before uploading.
Conclusion
Removing a background from an image comes down to two decisions that matter more than the mechanics of the removal itself: picking transparent versus white/solid based on where the image is actually going, and starting from the best-quality original photo you have, since edge precision depends heavily on the source image's resolution and contrast. The AI-driven automatic process handles the vast majority of everyday cases - logos, product shots, headshots, signatures - cleanly on the first pass, with hair, glass, and low-contrast photos being the main cases worth a manual double-check before calling the result finished. Plainscan's background remover handles the core task directly, and pairs with the passport photo tool for document-specific needs and image compression if the finished file needs to be a smaller size for upload - all without installing anything or creating an account for everyday use.
Related insights

Get the Plainscan App for iOS & Android