
How to Compress a PDF or Word File Before Converting (Without Losing Quality)
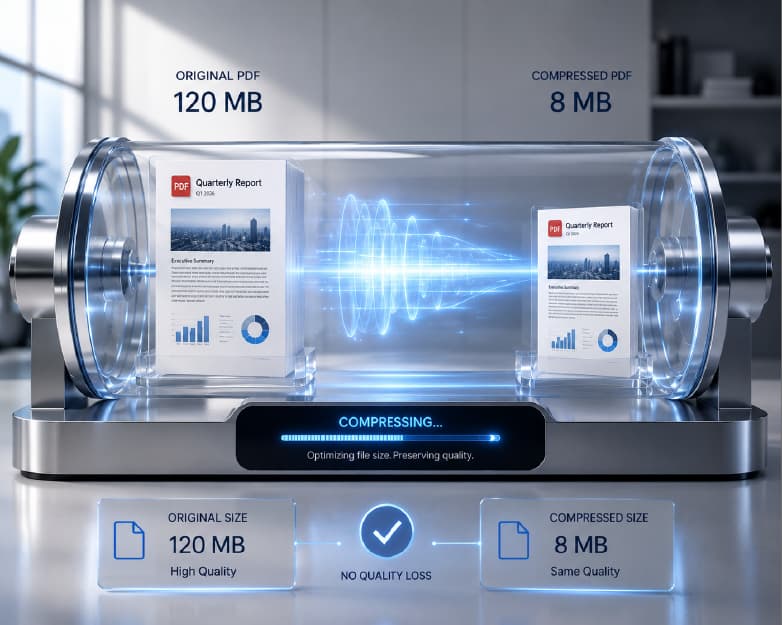
You're trying to convert a Word file to PDF for a job application, and the portal rejects it - too large. Or you've converted a PDF to Word for editing, and somehow the .docx that came out is bigger than the PDF you started with. Neither of these is really about "conversion" going wrong. It's a size problem hiding inside a format problem, and it trips up an enormous number of people who searched for a converter and ended up needing a compressor instead. This guide is specifically about that overlap - what to do when converting and shrinking a file need to happen at the same time, which almost nobody explains clearly, because most guides treat "convert" and "compress" as two completely separate tasks.
Why File Size Becomes a Problem the Moment You Convert
A Word document and a PDF store the same visual content in very different ways, and that difference is exactly where size problems come from.
Word files store images at whatever resolution they were inserted at, plus formatting instructions, plus (often) font data if you've used anything beyond the standard system fonts. None of that is compressed by default in the way a well-optimized PDF might be.
PDFs, when exported properly, can compress embedded images automatically and strip out anything not needed for display. But when a PDF is built badly - say, exported from a scanner at full resolution, or assembled by pasting screenshots into a page one at a time - none of that automatic tidying happens, and you get a file that's needlessly heavy before it's even converted anywhere.
So when you convert between the two formats, you're not just changing the wrapper. You're often exposing a size problem that was already baked into the source file, or in some cases creating a new one, because the conversion process itself has to re-embed images, rebuild fonts, and reconstruct layout information that wasn't stored efficiently to begin with.
There's also a difference between how images are stored, which matters more than most people realize. A photo pasted into Word at its original camera resolution - often 12 megapixels or higher on a modern phone - is massively oversized for a document meant to be read on a screen or printed at standard size. Word won’t automatically compress it unless instructed to do so. The same applies to the PDF which is created based on the high-resolution scans, where the amount of details captured by the scanner is way too much compared to the amount required by the reader. In essence, compression of content is nothing more than making up for its lack.
Should You Compress Before Conversion, or After?
This is what the majority of users who end up on a site like this try to figure out, and the answer is simply: it depends on the direction and reason behind the conversion.
Compress before converting when:
- Your source file is what's too large to upload to the converter in the first place (some tools cap uploads at 10–25MB on the free tier)
- You're converting a scanned PDF and the scan resolution is unnecessarily high (300+ DPI scans of simple text documents are usually overkill)
- Speed matters - a smaller input file converts faster, especially for OCR-heavy scanned documents
Compress after converting when:
- The size problem only shows up in the output - a PDF that converts to a bloated Word file, or vice versa
- You need to preserve maximum quality during the actual format change and only care about final delivery size (for example, converting a report to PDF for internal review, then compressing a separate lightweight copy just for emailing)
- You're not sure yet how much the conversion itself will affect size, so compressing the source first would be guesswork
If you're doing this regularly - say, converting scanned invoices to Word every week, or turning reports into PDFs for clients - it's worth compressing at whichever end of the process consistently causes the bigger file, rather than compressing both ends every time out of habit. That's usually the input for scan-heavy work, and the output for design-heavy Word documents converting to PDF.
A quick real-world example: a 40-page scanned textbook chapter, saved as a PDF straight off a scanner at 600 DPI, can easily run past 80MB. Converting that directly to Word - even with good OCR - carries that bloat straight through, and you end up with a Word file that's slow to open and painful to email. Compressing the PDF down to a reasonable 150–200 DPI first (plenty for on-screen reading and OCR accuracy) before converting typically cuts that 80MB down to under 10MB, with no visible loss in the converted text.
How to Compress a Word File Before Converting to PDF
This matters most when your Word document is full of images - a report with screenshots, a proposal with product photos, a thesis with diagrams and figures.
- Check where the size is actually coming from. In Word, go to File > Info, and look at the document size. If it's unexpectedly large, images are almost always the cause - text alone rarely adds meaningful weight to a file.
- Compress images inside Word directly. Select any image, go to Picture Format > Compress Pictures, and choose a resolution appropriate for how the document will be used - "Web" quality (roughly 150 DPI) is plenty for anything read on-screen or emailed, while "Print" quality (220 DPI) is worth keeping only if the PDF will actually be printed.
- Apply it to all images in the document, not just the one you clicked on - there's a checkbox for that in the same dialog, and skipping it is the single most common reason people think image compression in Word "didn't work."
- Remove images you don't actually need in the final version. It sounds obvious, but leftover placeholder images and old draft screenshots pad out file size for no reason.
- Now convert to PDF. With images already compressed, the resulting PDF inherits the smaller size instead of carrying the original bloat forward.
How to Compress a PDF Before Converting to Word
This direction matters most for scanned documents, since scan resolution is the single biggest lever on PDF file size.
Start by checking whether your PDF is a scanned image or a "born-digital" file with real text underneath - open it and try selecting a line of text with your cursor. If you can select and highlight text normally, it's digital and compression will mostly affect any embedded images. If nothing highlights and the whole page behaves like one solid image, it's a scan, and the entire page - not just embedded pictures - is what needs compressing.
For scanned PDFs specifically, run the file through a PDF compressor before converting, and choose a moderate compression level rather than the most aggressive one available. Extremely high compression on a scanned page can blur small text enough to hurt OCR accuracy during conversion - the exact opposite of what you want. A moderate setting keeps text crisp enough for accurate character recognition while still cutting file size significantly.
For digital PDFs with embedded high-resolution images (product catalogs, design portfolios, photo-heavy reports), compression works the same way as it does for Word - it targets the images, not the text, so there's very little quality tradeoff at a sensible compression level.
Why Your Converted File Ended Up Bigger Than the Original
This catches people off guard constantly, and it's worth explaining plainly rather than treating it as a mystery: conversion sometimes adds size instead of removing it, because of how the target format has to represent the same content.
- Converting a scanned PDF to Word through OCR doesn't just add text - it often keeps a copy of the original image behind the recognized text (so the layout still visually matches the source), which means you're now storing both the image and the extracted text data in one file.
- Converting Word to PDF re-embeds every font used in the document to guarantee it displays identically everywhere, and font embedding - especially for anything beyond basic system fonts - adds real weight that wasn't visible in the original Word file size.
- Table-heavy documents sometimes expand because a PDF's flat, pixel-precise layout instructions for a complex table take up more space than Word's more efficient structural table data.
None of this means the conversion tool did anything wrong. It's just a structural reality of moving between formats. The fix, in every case above, is the same: compress the output after conversion rather than assuming the input size will simply carry over.
Compress Word Online: What People Actually Mean by This
"Compress Word online" is one of the most searched terms in this space, and it covers two genuinely different situations people are usually in:
Reducing an existing Word file's size directly, without converting it to anything else - useful when a portal or email client has a strict .docx size limit and you need to submit the document as-is, not as a PDF. An online compressor for this works the same way as the in-Word method described above, but it's handy when you're on a shared or mobile device without Word installed.
Compressing a Word file specifically because you're about to convert it, which is really the "before converting" scenario covered earlier in this guide. If that's your situation, compress first and then run the conversion - don't convert first and hope the output comes out smaller by itself, since as explained above, conversion can just as easily go the other direction.
Either way, the safety question people ask alongside this - is it safe to compress a Word document online - comes down to the same basics as any online file tool: use a site with HTTPS, check that it states files are deleted after processing, and avoid uploading anything with sensitive personal data to a tool you don't recognize.
Compressing With iLovePDF, Docupub, and Similar Tools - What to Expect
A lot of people specifically search for compression through a named tool they've already tried, most commonly iLovePDF or similar single-purpose sites. These generally handle basic compression fine for straightforward files, but a few limitations show up often enough to be worth knowing before you rely on them for a compress-then-convert workflow:
- Separate steps for compress and convert, meaning you upload the file twice, to two different tools, and manually manage the in-between file - small friction, but it adds up if you're doing this regularly.
- Daily conversion or compression limits on the free tier that can interrupt a batch of several files.
- Compression settings that aren't visible or adjustable, so you can't dial back aggressiveness if you notice OCR or text quality suffering on a scanned document.
The advantage of doing this inside a single platform - Plainscan's compress-and-convert tools, for instance - is that the compressed file feeds directly into the converter without a re-upload step, and you can see and adjust the compression level before committing to it, which matters most for scanned PDFs where over-compression has a real cost.
A more established and simplistic site would employ one algorithm of compression without any adjustments made whatsoever. This works well in case of a one-time text file where quality does not matter much, but when working with images, it’s a risky move because you won’t be able to see the preview and change the settings, should you need to do so. If the application does not allow you to look at a compression setting or compare two files before and after the compression process was completed, take this as a reason to look into the outcome very carefully.
Compressing a Word File Specifically Before PDF Conversion (Step-by-Step)
Since this is one of the more specifically searched scenarios in this cluster, here's the complete path start to finish:
- Open the Word document and check File > Info for current size.
- Compress all images using Picture Format > Compress Pictures, applying to the whole document, at "Web" quality unless the PDF specifically needs to be print-ready.
- Delete any unused or leftover embedded objects - old draft images, unused text boxes, empty tables.
- Save the Word file and check the size again to confirm the reduction actually took effect.
- Convert to PDF using Plainscan's Word to PDF tool, which preserves the now-compressed images without re-inflating them during export.
- Do a final size and quality check on the resulting PDF - if it's still larger than needed, run it through a PDF compressor as a last step, since PDF-specific compression can catch anything Word's image compression missed.
Compressing a PDF Specifically Before Word Conversion (Step-by-Step)
And the reverse direction:
- Open the PDF and check whether it's a scan (whole page behaves like an image) or digital (text is selectable).
- If it's a scan, run it through a compressor at a moderate setting - not the most aggressive option, to protect OCR accuracy.
- If it's digital with large embedded images, standard PDF compression handles this safely at a higher compression level, since there's no OCR risk involved.
- Convert the compressed PDF to Word using OCR (for scans) or standard layout conversion (for digital PDFs).
- Spot-check the converted Word document for any text that looks garbled or misread - this is the tell-tale sign that compression was too aggressive for the OCR step, and you'd want to redo it from a less-compressed version of the PDF.
Common Mistakes People Make When Compressing and Converting Together
Compressing a scanned PDF too aggressively before OCR. This is the single most common mistake in this whole workflow. Heavy compression blurs small text just enough that OCR starts misreading characters - a lowercase "l" becomes a "1," a "5" becomes an "S." Always err toward moderate compression on anything going through OCR.
Re-compressing an already-compressed image. JPEG images lose a small amount of quality every time they're compressed and re-saved. If a Word document already has web-optimized images and you run it through another aggressive compression pass, you're stacking quality loss for very little extra size reduction. Check the current image resolution before compressing again.
Assuming compression order doesn't matter. As covered above, it genuinely does - compress-then-convert and convert-then-compress can produce meaningfully different results, especially for scans and font-heavy Word documents.
Ignoring the destination's actual size limit. People often compress down to an arbitrary "smaller" file rather than checking what the actual limit is - an email attachment cap is usually 25MB, most government upload portals sit between 5–10MB, and WhatsApp compresses documents further on its own end regardless of what you send. Compress to comfortably under the real limit, not just "smaller than before."
Compressing for Specific Upload Limits
A few limits come up constantly enough to be worth listing directly, since "how small does this actually need to be" is often the real question behind a compression search:
- Standard email attachment size limits: Most email service providers keep this at 25MB; however, for some enterprise solutions, this figure could be less.
- Government websites and university portals: Typically, the limit here would be around 5–10MB, occasionally as low as 2MB for scanning in identification documents.
- Application websites for jobs: Usually, a limit would be between 2–5MB for sending a resume and cover letter; this size allowance would be enough for a plain Word document or PDF, but would pose issues if an applicant had a photograph or fancy design.
- WhatsApp and other messenger services: In terms of file sizes, these do allow users to send larger files, although any document that is sent is automatically compressed.
Converting and Compressing on Mobile
The same compress-then-convert or convert-then-compress logic applies identically on a phone - there's no separate mobile process. Open the file from your camera roll, cloud storage, or downloads folder in your phone's browser, run it through the compressor first if that's the step you need, then feed the result into the converter. Everything described in this guide works the same way in a mobile browser as it does on desktop, since it's server-side processing rather than something that depends on your device's power.
Compression Levels Explained: What "Low," "Medium," and "High" Actually Do
Most compression tools present a slider or a set of presets without explaining what's actually happening underneath, which makes it hard to pick the right one with any confidence. Here's what each level is really doing to your file.
Low compression targets redundant data only - things like duplicate metadata, unused embedded fonts, and minor image re-encoding that's genuinely invisible to the eye. This typically shaves 10–20% off a file's size and is close to risk-free for any document type, including scans headed for OCR.
Medium compression starts reducing image resolution meaningfully - usually down to somewhere in the 150 DPI range - and re-encodes images with a slightly more aggressive algorithm. This is where most of the real size reduction happens, often 40–60% off the original, and it's the sweet spot for the majority of everyday documents: reports, contracts, scanned forms, presentations with photos.
High compression pushes image resolution down further, sometimes to 100 DPI or below, and applies more aggressive JPEG-style compression artifacts to embedded images. Text-only pages are barely affected, but photo-heavy pages start showing visible quality loss - soft edges, slight color banding, minor blur. This level is appropriate when the destination genuinely doesn't matter for visual quality (a quick internal reference copy, for example) but risky for anything going through OCR or anything that will be printed.
Extreme or "maximum" compression, where offered, treats every page more like a low-resolution thumbnail. It's really only appropriate for situations where file size is the only priority and the content will never be read closely - archiving a huge batch of old receipts for record-keeping, for instance, not converting a document you need to actually use.
The practical takeaway: for anything headed into OCR or Word conversion, stay at low or medium. High and extreme settings are built for storage and archiving, not for feeding into a conversion pipeline where character-level accuracy matters.
How Much Size Reduction Is Actually Realistic?
People often go in expecting a specific percentage without accounting for what kind of document they're actually compressing, which leads to disappointment either way - either the file barely shrinks, or it shrinks so much the quality tanks. Realistic expectations by document type:
Text-only Word or PDF documents (contracts, essays, plain reports with no images) - very little to compress in the first place, typically 5–15% reduction, because there's almost nothing but text and structural data taking up space. If a text-only document is unexpectedly huge, the cause is usually something other than needing compression - leftover tracked changes, embedded fonts, or a corrupted formatting history.
Documents with a handful of photos or screenshots (a typical business report or student assignment) - this is where compression does real work, commonly 50–70% size reduction at medium settings, since images are almost always the dominant contributor to file size in a mixed document.
Scanned PDFs – potentially the greatest savings of all, typically 70-90%, since default settings on scanners are often way too high for the actual contents. Even for scanned pages of text, 200 DPI is more than sufficient for readability and OCR accuracy but still most scanners are set at 300 or 600 DPI by default without taking into account actual content.
Design-centric documents (such as portfolios or brochures with full-page images) – the lowest percentage that can be safely reduced, usually 20-40% because the images perform actual design tasks and any excessive compression is instantly visible.
Understanding which category your document belongs to will give you an idea of what to expect and will help to understand if it even makes sense to compress it before converting or not.
Batch Compressing and Converting Multiple Files
If you're processing more than a handful of files regularly - course materials, weekly reports, a folder of scanned receipts - doing this one file at a time through separate compress and convert steps becomes its own time cost. A few things make batch workflows meaningfully faster:
Sort files by type before starting. Group scanned PDFs separately from digital ones, since they need different compression settings (moderate for scans headed to OCR, more aggressive is fine for digital files). Running a whole mixed batch at one uniform setting means either over-compressing your scans or under-compressing your digital files.
Set a consistent target quality once, rather than adjusting per file. Most batch tools let you apply one compression profile across an entire folder - pick medium compression as a safe default for a mixed batch of everyday documents, and only pull out individual files for custom handling if something looks off in the result.
Check a sample before committing to the full batch. Compress and convert two or three representative files first - one text-heavy, one image-heavy, one scanned if applicable - and review the output before running the same settings across fifty files. This catches an over-aggressive setting before it costs you real time redoing a whole batch.
Leave your compressed copies separate from your source files until you make sure that the batch process was executed properly. It may sound like a minor thing to do, but it can save you a lot of time since you won't have to repeat the entire process in case of an error.
A Quick Checklist Before You Compress and Convert
- Confirm whether your PDF is scanned or digital - this determines your safe compression ceiling
- Check the actual size limit of wherever the file is going, rather than guessing
- Pick compression direction based on where the bloat is actually coming from - source file or converted output
- Use medium compression as a safe default; only go higher if you've confirmed the destination doesn't need visual or OCR precision
- Spot-check the result before sending or submitting, especially for anything that went through OCR
When Not to Compress at All
Not all instances call for compression, and there may be occasions where it is best not to compress files at all, instead of blindly compressing everything.
Legal or archival documents, which require you to show that the file has remained in its original form - certain businesses actually note if the image has been recompressed or the PDFs re-processed as part of their chain-of-custody procedures. In case you are dealing with a document that could potentially wind up in legal trouble, have an unmodified version handy along with the compressed one.
Documents, which already meet the size criteria you need - a five-page contract already weighing in at 800KB and with a 10MB file size limit does not gain anything from being compressed.
Anything going to print professionally. Print shops and professional printing services often want the highest-resolution version available, since their own systems handle size differently than a web upload does. Compressing before sending to a printer can visibly hurt output quality in a way that never shows up on a screen.
Files for design that require high resolution – architectural plans, technical drawings, exports of medical imaging – since even light compression might degrade the level of resolution required. In these cases, it is advisable to limit the file size either by splitting the file or providing a URL for sharing rather than compressing it.
Real Scenarios: Compress and Convert in Practice
A student submitting a scanned assignment. Fifteen pages, scanned on a phone at full camera resolution, PDF comes out at 45MB - well over the university portal's 10MB cap. Running it through moderate compression first (protecting OCR accuracy isn't even necessary here since it's staying as a PDF, not converting to Word) brings it down to roughly 6MB with no visible quality loss on-screen, well within the limit.
A job applicant converting a resume built in Canva. The exported PDF is 3.2MB - small in absolute terms, but heavier than it needs to be because of an embedded high-resolution header image. Before converting to Word (some application portals request .docx specifically), compressing the PDF's single large image cuts it to under 500KB, and the resulting Word file stays lightweight rather than inheriting the bloated image.
A small business owner converting scanned supplier invoices to Word for bookkeeping software. A batch of forty scanned invoices, each 8–12MB at the scanner's default 600 DPI setting. Compressing the whole batch to 200 DPI before running OCR conversion cuts the total batch size by roughly 80%, speeds up the conversion process noticeably, and the extracted invoice numbers and totals convert with no accuracy loss, since 200 DPI is still comfortably sharp for typed text.
Can Your Choice of Format Impact Size? .DOC VS. .DOCX
Mentioned as something that is mentioned alongside compression for good reason: .docx file sizes are inherently going to be smaller than .doc file sizes due to the inherent use of compressed XML formats in .docx vs. binary formats in .doc. When working in .doc because you need to, converting to .docx prior to applying any sort of compression at all can net you considerable savings of space in its own right, especially for document images.
Frequently Asked Questions
Does compressing a PDF affect the accuracy of a Word conversion?
It can, specifically for scanned PDFs going through OCR. Moderate compression is generally safe; aggressive compression risks blurring text enough to cause misreads. Digital PDFs with selectable text aren't affected the same way, since compression there only touches embedded images, not the text itself.
Why is my converted Word document bigger than the PDF I started with?
Usually because OCR conversion keeps a background image copy alongside the extracted text, or because font embedding and layout reconstruction add data that wasn't visible in the original file's size. This is normal - compress the output afterward rather than expecting the conversion to shrink it.
Should I compress a Word file before or after converting it to PDF?
Before, if the size problem is coming from embedded images in the Word file itself - compressing first means the PDF inherits the smaller size. After, if you specifically need to preserve full image quality through the conversion and only care about the final delivery size.
Is it safe to compress a Word document online?
Yes, provided the tool uses HTTPS and states that uploaded files are deleted after processing. For documents containing sensitive personal or financial data, compressing locally through Word's built-in Compress Pictures feature avoids the upload step entirely.
Can I compress and convert a file in one step?
Yes, on a platform that offers both tools together - you compress first, and the compressed file carries directly into the converter without needing a separate upload. This is faster and avoids the quality-stacking issue of running a file through multiple unrelated tools back to back.
What's the best compression level for a scanned document I'm about to convert with OCR?
Moderate, not maximum. A resolution around 150–200 DPI is generally the sweet spot - high enough for accurate character recognition, low enough to meaningfully cut file size. Going below that for small or dense text noticeably increases OCR error rates.
How do I know if my Word file's size problem is coming from images or something else?
Check File > Info for the document size, then look at how many images it contains and roughly how large the originals were. If the document is mostly text with only one or two small images, size problems more likely come from embedded fonts, tracked changes history, or leftover formatting - not images.
Does converting DOC to DOCX reduce file size on its own?
Often, yes. DOCX's compressed XML structure is inherently more space-efficient than the older DOC binary format, so converting between them can shrink a file somewhat even before any deliberate compression is applied - particularly for documents with embedded images.
Will compressing my file multiple times keep shrinking it further?
No, and it can actively hurt quality. Compression removes redundant or non-essential data, but once that's gone, running it again mostly just re-processes already-compressed images, causing incremental quality loss for very little additional size reduction. Compress once, at the right level, rather than repeatedly.
Is there a difference between compressing before uploading to a converter versus letting the converter compress automatically?
Some converters apply light automatic optimization during conversion, but this is usually minimal and not something you can control or verify. Compressing deliberately beforehand - especially for scanned documents - gives you visibility into the setting used and a chance to check the result before committing to the conversion.
My scanner defaults to a very high DPI setting - should I change it, or compress after scanning?
If you scan the same type of document regularly, it's worth lowering the default scan resolution rather than compressing after the fact every time - 200 DPI is generally sufficient for standard text documents and OCR accuracy, and scanning at that resolution from the start saves the extra compression step entirely. Reserve higher scan resolutions for documents with fine print, small diagrams, or anything where visual detail genuinely matters.
Conclusion
Compressing and converting aren't really two separate problems - they're two ends of the same task whenever your file is both the wrong format and too large. Getting the order right, and knowing which direction of conversion is likely to add size back in, saves the frustrating cycle of compressing, converting, discovering the output is huge again, and starting over. Plainscan handles both halves of this in the same place - compress a file, then convert it, without a re-upload in between, and with visible compression settings so you're not guessing how aggressive it's being on a scanned document. Most people only need to think through this once - figure out which direction of conversion tends to bloat your specific files, build a habit around compressing at that end, and the whole compress-and-convert cycle stops being something you have to troubleshoot each time it comes up.
Further Reading:Convert HEIC to JPG Online for Free | iPhone Photos Guide
Related insights


Get the Plainscan App for iOS & Android