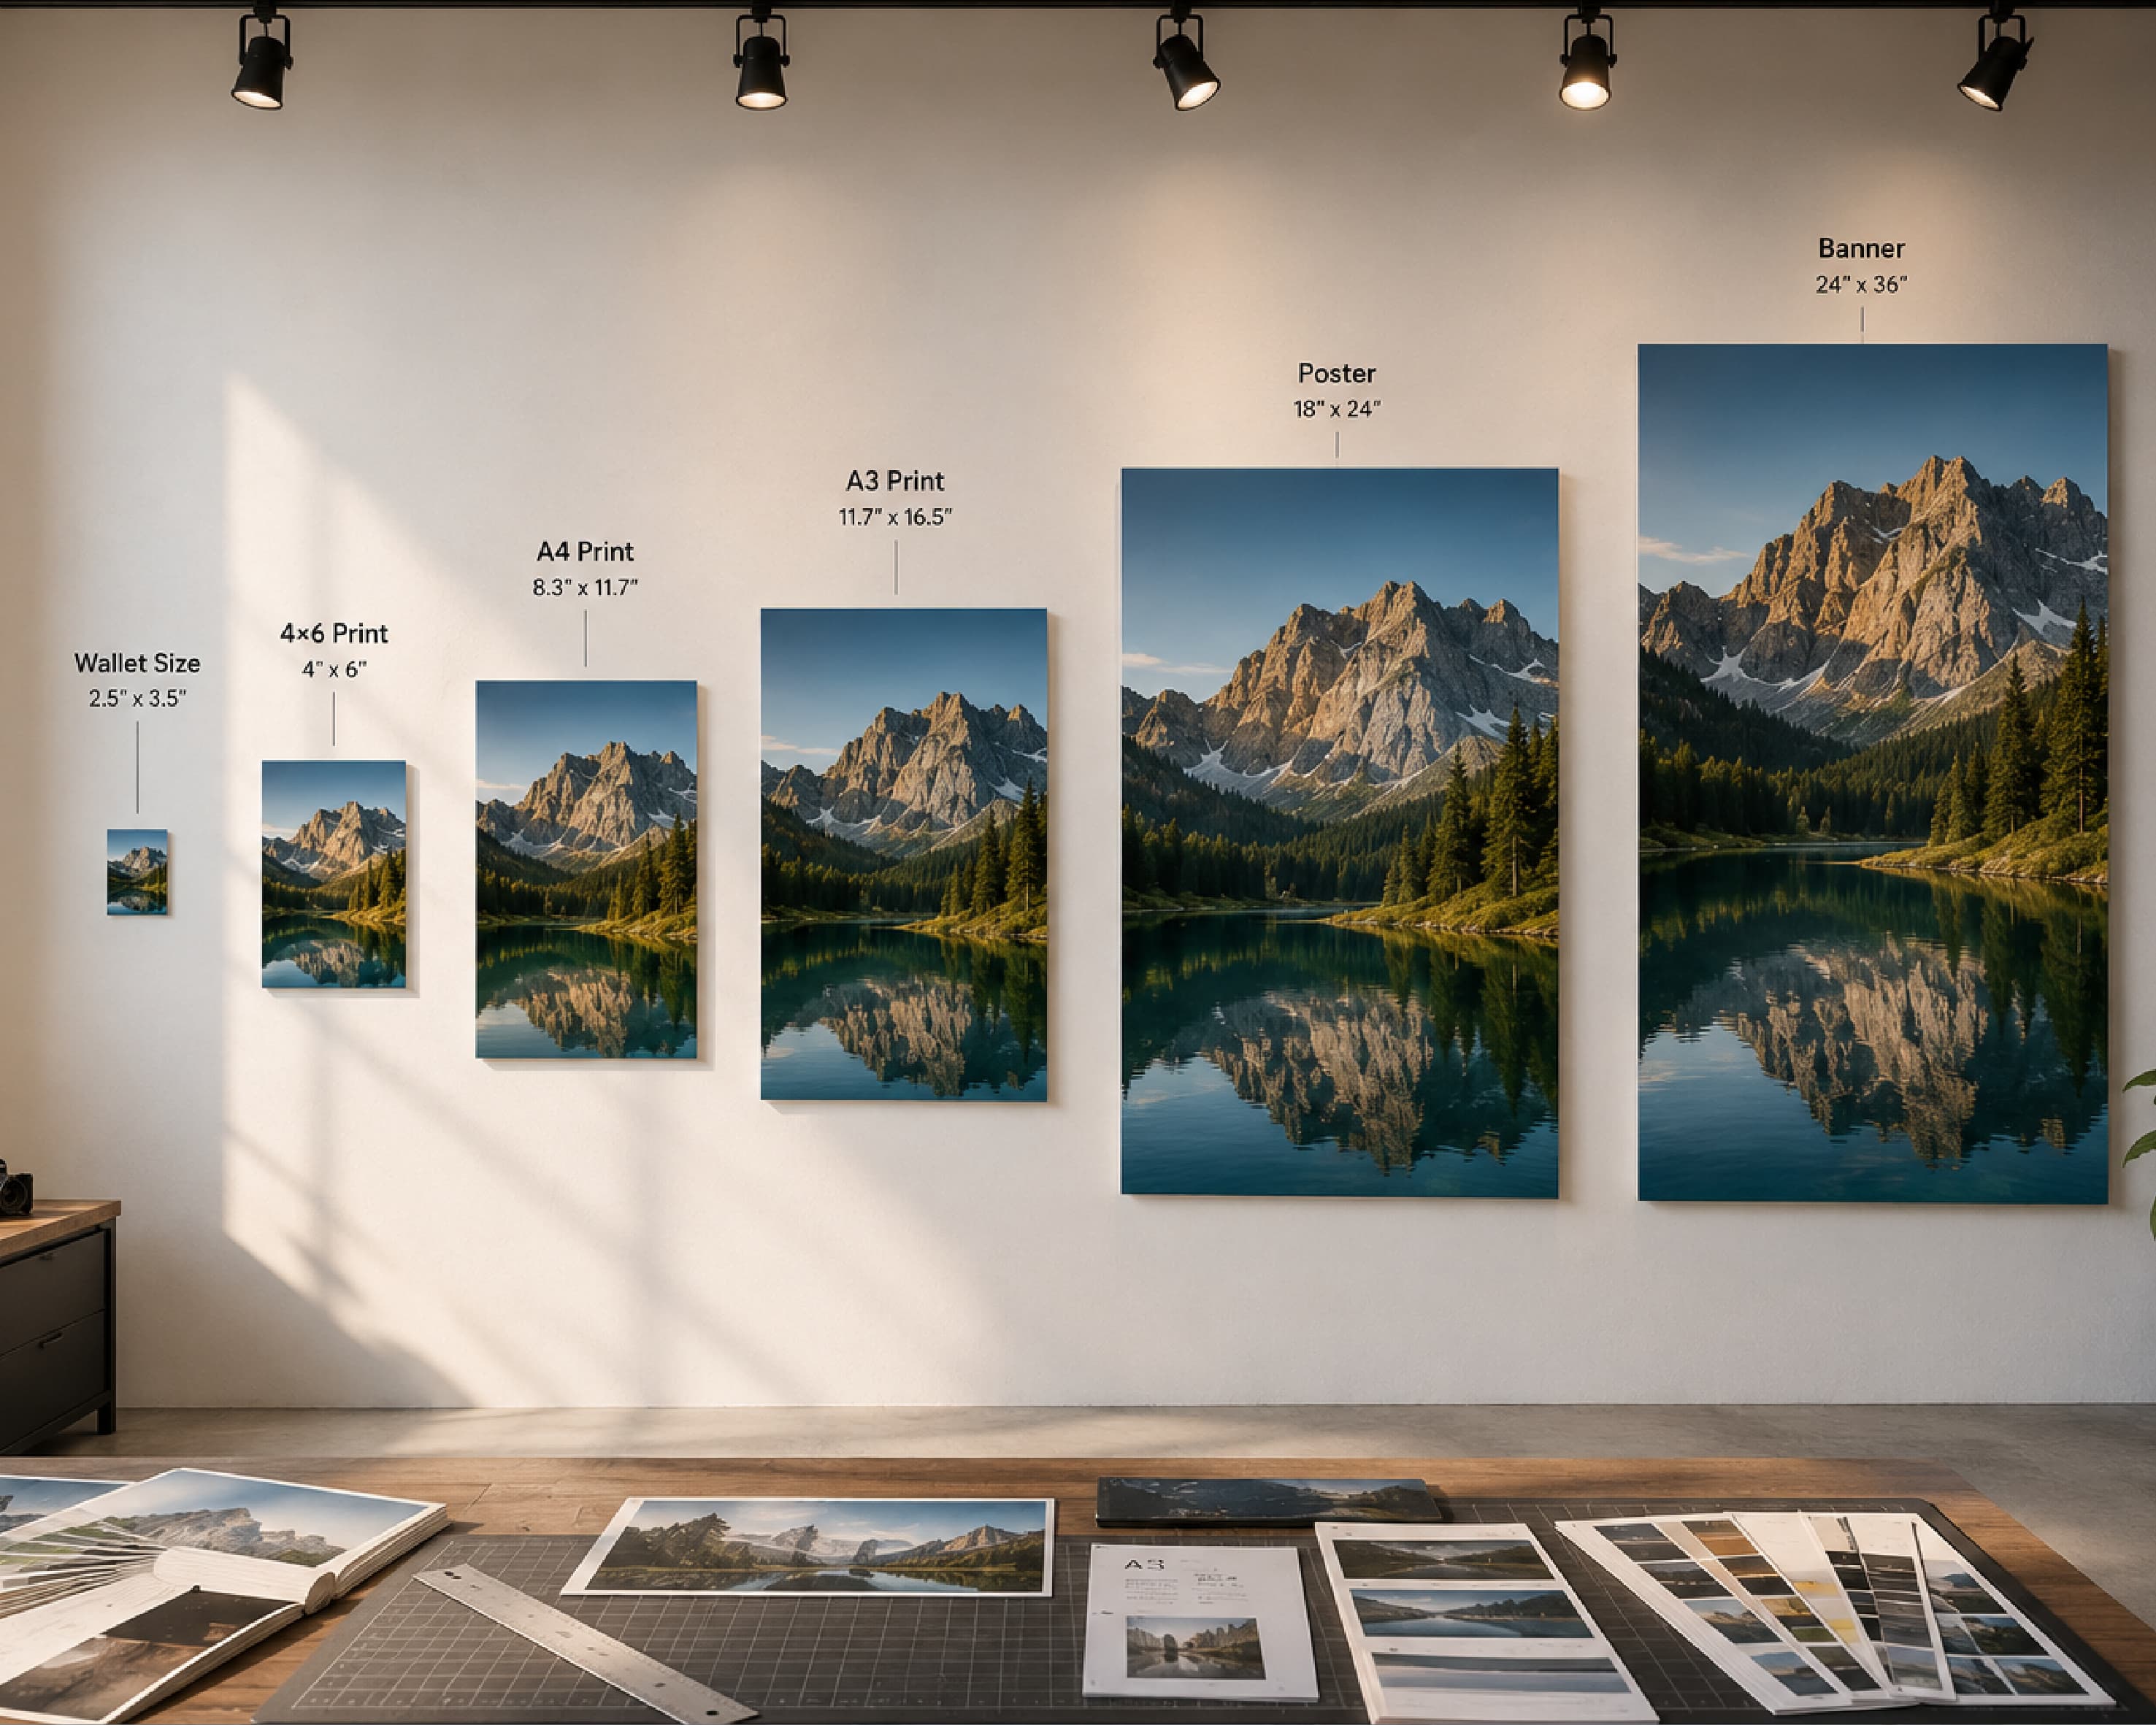
How to Resize an Image Online (Free, No Blur, No Distortion)
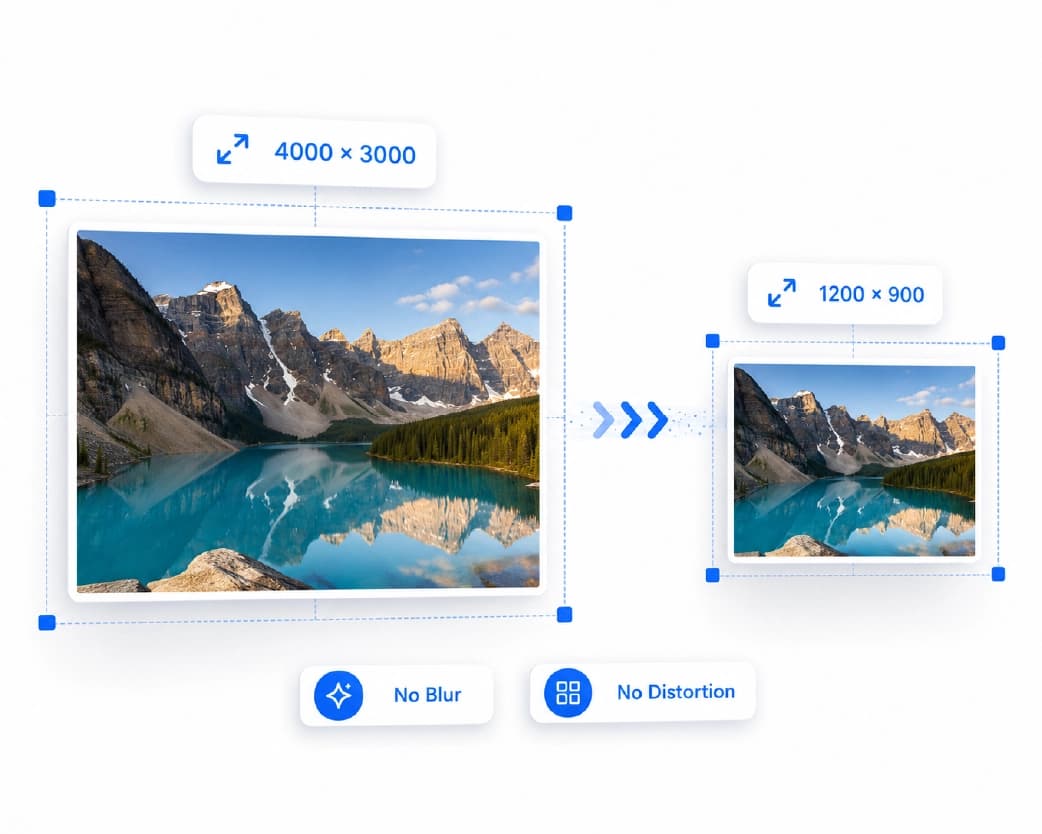
Resizing an image means changing its pixel dimensions - making it wider or narrower, taller or shorter - while keeping it looking exactly like the original, just at a different size. The fastest way to do this without distorting the image or introducing blur is a browser-based resizer that locks the aspect ratio automatically: upload the image, enter the dimensions you need (in exact pixels or as a percentage), and download the result. No software installation, and for most everyday resizing, no account required. This guide covers resizing to exact pixel dimensions, resizing by percentage, the common social media presets people need most (Instagram, YouTube, Facebook, Twitter), batch resizing many images at once, and - importantly - where resizing's limits are: what it can't do, and which task (compression or AI upscaling) you actually want instead if "resize" isn't quite the right word for what you're trying to accomplish.
Recommended to Read:The All-in-One AI-Powered Document and Productivity Platform
What Resizing Actually Does (And Doesn't Do)
Resizing changes an image's width and height in pixels. That's the whole operation - it doesn't touch the image's compression, format, or overall visual quality beyond what naturally happens when you make something smaller or larger. Shrinking an image down is almost always safe from a quality standpoint: a large photo scaled down to a smaller size still has more than enough pixel detail for the smaller size, so it looks just as sharp, often sharper, since there's more source detail than the smaller canvas needs.
Enlarging an image is where resizing hits a real limit. Traditional resizing enlarges an image by interpolating - mathematically estimating what the color values \"in between\" existing pixels should probably be. This works, but it can't invent detail that was never captured in the original file, so enlarging a small image very much this way makes it look progressively softer and blockier the larger you go. If you need to make a small or low-resolution image significantly larger while keeping it sharp, that's a fundamentally different task - AI upscaling, which uses a trained model to reconstruct plausible new detail rather than just stretching existing pixels - not standard resizing. This distinction matters enough that it's worth being direct about it upfront: a resize tool is for changing dimensions, not for fixing a low-resolution image so it looks sharp at a much bigger size.
Resizing vs. Reducing File Size: A Common Mix-Up
A large share of people searching for \"resize image\" are actually trying to solve a different problem: making a file smaller in kilobytes or megabytes, often to meet an upload limit - a form, a job portal, an email attachment cap. This is worth clarifying directly, since the two tasks solve different problems even though \"resize\" and \"reduce\" get used interchangeably in casual search.
Resizing changes pixel dimensions. It can indirectly reduce file size too, since fewer pixels generally means less data - but it's not optimized specifically for hitting a target file size, and reducing dimensions enough to meaningfully shrink a file often means the image displays smaller than you actually want.
Compressing reduces file size by encoding the existing image data more efficiently (or, for lossy compression, discarding the least visible detail), without necessarily changing the pixel dimensions at all. If your actual goal is \"get this file under 100KB\" rather than \"make this image a specific width and height,\" compression - not resizing - is the more direct tool for that job.
In practice, the two are often used together: resize an oversized image down to a sensible dimension for its intended use first, then compress the result if the file size still needs to come down further. If you're chasing a specific KB or MB target specifically, Plainscan's compression guide covers that workflow directly.
Step-by-Step: Resizing an Image Online
Using Plainscan's image resizer:
- Upload your image. JPG, PNG, and WebP all work as input.
- Choose exact pixels or a percentage. Exact pixels are right when you need a specific dimension - a required upload size, a particular display spec. Percentage is right for a quick, proportional adjustment - \"make this 50% smaller\" - without needing to calculate the exact resulting pixel count yourself.
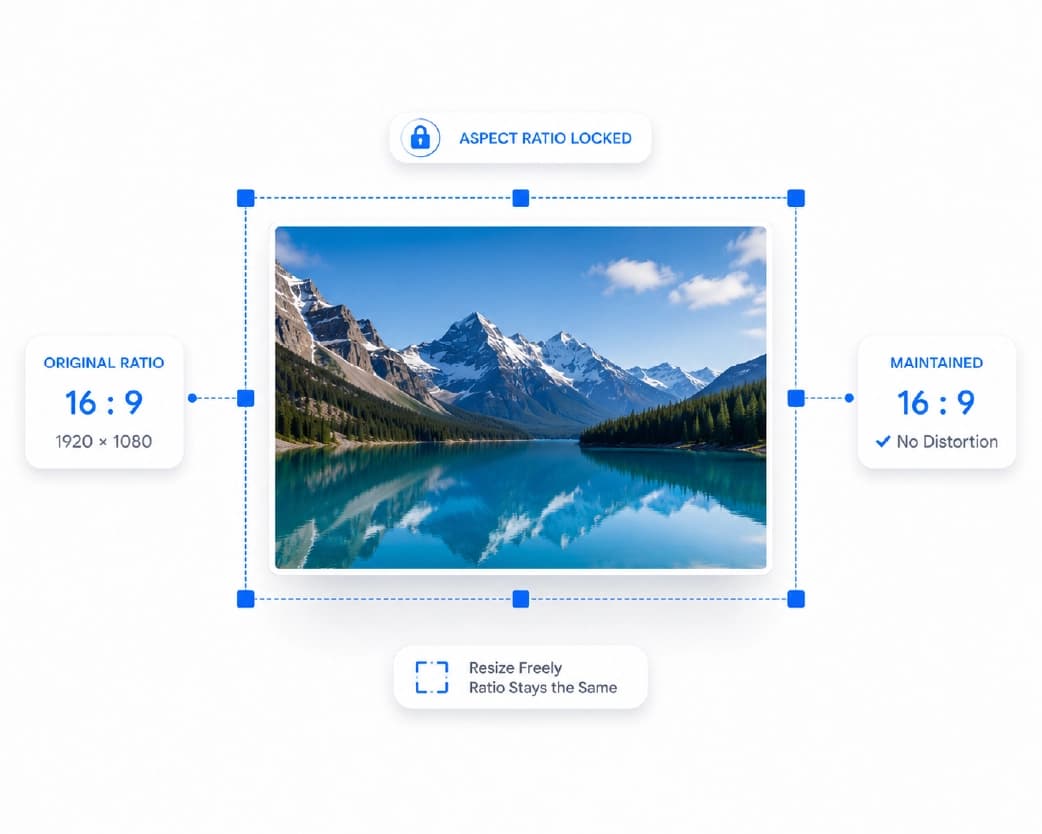
- Keep \"lock aspect ratio\" enabled unless you specifically want to stretch or distort the image - this is on by default, and turning it off is rarely what you actually want (covered in more detail below).
- Check the live preview of the new dimensions before committing, to confirm the numbers match what you actually need.
- Download the resized image.
This tool processes images directly in your browser rather than uploading them to a server - worth knowing if you're resizing anything sensitive, since the file doesn't leave your device during the resize itself.
Using Preset Sizes for Social Media and Common Formats
Rather than calculating exact pixel dimensions from scratch, Plainscan's resizer includes presets for the most common destinations:
- HD (1280×720) and Full HD (1920×1080) - standard screen and video display resolutions
- 4K (3840×2160) - for high-resolution displays and modern presentation needs
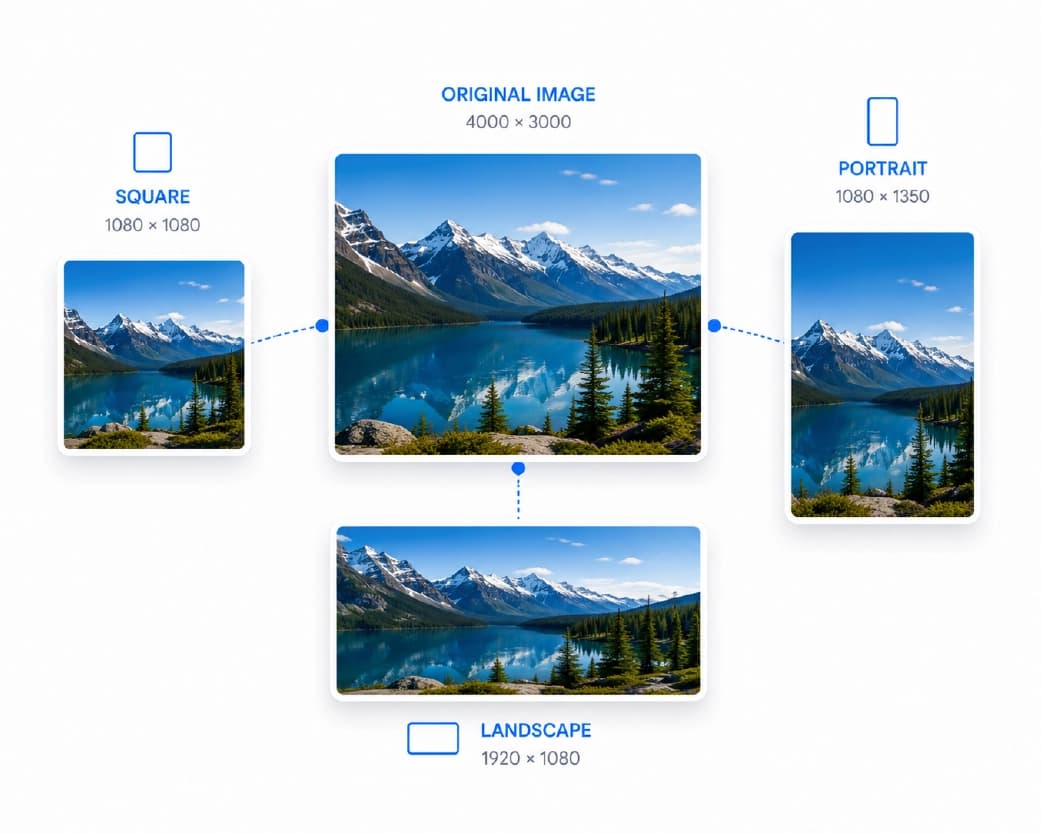
- Instagram Square (1080×1080) and Instagram Portrait (1080×1350) - the two most common Instagram post formats
- Facebook Cover (851×315)
- Twitter Header (1500×500)
- YouTube Thumbnail (1280×720)
Using a preset avoids the common mistake of guessing at \"close enough\" dimensions and having a platform crop or letterbox the image unexpectedly after upload. Since platform-required dimensions change occasionally as apps update their layouts, it's worth double-checking a preset against the platform's current specs if the image is for something high-stakes (a paid ad, a client's branded content) rather than assuming a preset list is permanently accurate - but for everyday posting, these presets reflect the dimensions each platform is currently built around.
Resizing by Percentage vs. Exact Pixels
Percentage resizing is the right choice when you don't have a specific required dimension in mind, just a general \"smaller\" or \"bigger\" - cutting a large camera photo down by 50% before emailing it, for instance, without needing to know or calculate the exact resulting pixel count. It's fast and proportional by definition, so there's no risk of accidentally distorting the image.
Exact pixel resizing is the right choice whenever a destination has a specific required or recommended dimension - a form that specifies \"must be exactly 600×800 pixels,\" a website that expects images at a particular size for its layout, or any of the social media presets covered above.
When resizing to an exact pixel target, keeping aspect ratio locked means you can only set one dimension precisely (width or height) while the other adjusts proportionally - if the required dimensions don't share the same aspect ratio as your original image, you'll need to crop first, since forcing both exact dimensions with aspect ratio unlocked will stretch and distort the image, covered next.
Why Locking Aspect Ratio Matters
Aspect ratio is the proportional relationship between an image's width and height. Locking it during a resize means both dimensions scale together proportionally - an image that starts at a 3:2 ratio stays at a 3:2 ratio at any size you resize it to. Unlocking aspect ratio lets you set width and height independently, which sounds useful but almost always produces a visibly stretched or squashed result unless the new dimensions happen to share the exact same ratio as the original.
The visual effect of an unlocked, distorted resize is usually obvious and unflattering - faces look subtly warped, straight lines that should be vertical or horizontal end up slightly skewed, and the overall image reads as \"off\" even to someone who couldn't articulate exactly why. Keeping aspect ratio locked by default (as most resizers, including Plainscan's, do) avoids this by design - the main reason to deliberately unlock it is a specific, intentional need to force an image into a size with a genuinely different proportion than the original, in which case cropping to the target ratio first, then resizing, produces a cleaner result than stretching.
Batch Resizing Multiple Images
For anyone resizing more than a handful of images - a product catalog needing a consistent size, an entire folder of event photos being prepared for a website - resizing one at a time is a real bottleneck. Plainscan's resizer supports processing entire folders at once, applying the same target dimensions or percentage across every file in a batch rather than requiring you to configure and run each image individually.
For a batch with mixed original dimensions or orientations (some landscape, some portrait), it's worth deciding upfront whether percentage-based resizing (which scales each image proportionally to its own original size) or a fixed exact-pixel target (which forces every image to the same final dimensions, cropping or letterboxing as needed depending on the tool) better fits your actual goal - a product catalog usually wants uniform exact dimensions across every listing image, while a personal photo archive being proportionally shrunk for storage usually just wants consistent percentage scaling regardless of each photo's original size.
Resizing for Specific Use Cases
Website and Web Performance
Oversized images are one of the most common causes of slow-loading websites, and resizing images down to the dimensions they'll actually display at (rather than uploading a full camera-resolution photo into a layout that only shows it at a fraction of that size) is one of the simplest, highest-impact performance fixes available. If a website's image container displays at 800 pixels wide, uploading a 4000-pixel-wide photo forces visitors to download five times more image data than the page actually needs, with zero visible quality benefit at that display size.
Printing
Print requires meaningfully higher pixel density than screen display - resizing an image down for print purposes isn't usually the concern (most photos have more than enough resolution for typical print sizes); the more common print-related need is confirming an image has enough resolution at the intended print dimensions, which is closer to an upscaling question than a resizing one if the source image turns out to be too small.
Passport and ID Photos
Passport and ID photos have strict, specific dimension and background requirements that vary by country and document type. While a general resize tool can get an image to specific pixel dimensions, a dedicated passport photo tool is generally the better choice for this specific use case, since it accounts for the required background color and precise sizing specifications together, rather than leaving you to separately handle background compliance and exact dimensions as two disconnected steps.
Email and Messaging
Resizing large photos down before attaching them to an email - particularly several at once - avoids hitting attachment size limits and makes the email meaningfully faster to send and receive on both ends, without requiring the recipient to download unnecessarily large files just to view a photo on a phone or laptop screen.
Resizing on Mobile
The process works the same way in a mobile browser as on desktop - upload a photo directly from your camera roll, set the target dimensions or percentage, and download the resized file to your phone. This is particularly useful for quickly preparing a photo for messaging or social media right after taking it, without needing to transfer the file to a computer first. Since the resize happens locally in the browser rather than uploading anywhere, this also works reliably even on a slow or unreliable mobile connection, since there's no large file upload involved in the process.
Real-World Use Cases for Resizing
- Content creators and social media managers resize the same source photo into several different dimensions for different platforms - a square version for Instagram, a wide version for a Twitter header, a specific thumbnail size for YouTube - from a single original rather than needing separately-shot or separately-cropped versions for each destination.
- E-commerce sellers resize product photos to the exact dimensions their marketplace or storefront platform specifies, since inconsistent image sizes across a product catalog look unprofessional and can cause layout issues on category and search pages.
- Web developers and site owners resize images down to the actual dimensions they'll display at within a page layout, directly improving page load speed - one of the more impactful, low-effort site performance fixes available, as covered above.
- Students and professionals resize photos and scanned documents to meet specific upload requirements for application portals, forms, and submission systems that specify exact pixel dimensions alongside file size limits.
- Photographers and designers resize finished work down for web preview or client proofing purposes, keeping a full-resolution original on file while distributing a smaller, faster-loading version for casual viewing or online display.
- Anyone preparing images for email or messaging resizes oversized camera photos down before sending, avoiding slow uploads, attachment size limit issues, and unnecessarily large downloads on the recipient's end.
How Different Image Formats Behave When Resized
JPG images resize cleanly for photographic content - since JPG doesn't support transparency and is built around smooth color gradients rather than sharp edges, resizing (whether up or down within reason) generally looks natural for real-world photos.
PNG images, particularly those with transparency or sharp text and edges (screenshots, logos, graphics), also resize well, though it's worth noting that PNG files don't get smaller through the resize process the way a photo's file size scales down - a PNG's size is more closely tied to color complexity and detail than to the compression trade-offs that affect JPG.
WebP images behave similarly to JPG and PNG depending on whether the specific WebP file uses lossy or lossless encoding, and generally resize with good results either way, though as with any WebP use, it's worth confirming your destination actually supports the format before committing to it for a file you can't easily redo.
Across all three formats, the core resizing math (pixel dimension change, aspect ratio) works identically - format mainly affects file size and edge/transparency handling, not how reliably the actual dimension change itself performs.
Resizing Screenshots and Scanned Documents
Screenshots and scanned document images are a slightly different case than photographs, since they often contain fine text or sharp interface elements rather than smooth photographic gradients. Shrinking a screenshot down generally works fine as long as the text remains legible at the smaller size - small text can become difficult to read once a screenshot is reduced significantly, which is worth checking visually rather than assuming a percentage reduction that works well for a photo will work equally well for text-heavy content. Enlarging a screenshot or scanned document runs into the same fundamental resizing limitation covered earlier - a low-resolution scan or screenshot enlarged significantly will look progressively blurrier, and if a sharper, larger version is genuinely needed, that's again an AI upscaling task rather than a standard resize.
Common Problems and How to Fix Them
- The resized image looks stretched or squashed. This almost always means aspect ratio wasn't locked during the resize, and the new width-to-height ratio doesn't match the original. Re-doing the resize with aspect ratio locked, or cropping to the target ratio first, resolves this.
- The image looks blurry after making it bigger. This is expected behavior for standard resizing, not a malfunction - traditional resizing can't add detail that wasn't in the original file, so enlarging beyond the source's native resolution always introduces some softness. If a sharp, larger result is what you actually need, that calls for AI upscaling rather than standard resizing.
- The resized image still doesn't fit a strict file size limit. As covered above, resizing and compressing are different tools for different problems - if dimensions are already correct but the file size is still too large, running the resized image through a compression tool afterward addresses the file size specifically.
- A batch resize applied inconsistent results across images with different original sizes or orientations. This usually comes down to whether percentage or exact-pixel resizing was used, per the batch section above - percentage scales proportionally to each image's own original size, while exact-pixel targets force uniform final dimensions, which can crop or letterbox differently depending on each source image's original proportions.
- The image lost noticeable quality even though I only made it slightly smaller. A small size reduction shouldn't meaningfully affect quality - if it does, check whether the file was also re-compressed or re-saved through a lossy format during the same process, since repeated lossy re-saves (not the resize dimension change itself) are the more likely cause of any visible quality drop.
Is It Safe to Resize Images Online?
Because Plainscan's resizer processes images directly in the browser rather than uploading them to a server, this is one of the more privacy-friendly tools on the site by default - the file doesn't leave your device during the resize itself, which is worth knowing if you're working with anything sensitive. This is a different privacy model from server-based tools elsewhere on the site (which delete files within 24 hours of processing but do require the file to be uploaded), and it's a meaningful distinction if server exposure, even briefly, is a concern for a specific image.
How This Compares to Other Resizing Options
Photoshop and other desktop editing software include resizing as one feature within a much broader, often paid, application - useful if you're already doing other editing work, but unnecessary overhead if resizing is the only task at hand. Canva offers resizing bundled into a broader design platform with social media presets and drag-and-drop editing, which suits people who want to adjust the design alongside the resize rather than just change dimensions. Dedicated browser-based resizers like Plainscan's, PicResize, and ResizePixel focus narrowly on the resize task itself, without requiring a design-platform subscription or software installation for something that's fundamentally a quick, single-purpose operation.
Best Practices for Resizing Images
- Know your target dimensions before you start, whether that's a specific pixel requirement, a percentage reduction, or a platform preset - deciding this upfront avoids the trial-and-error of resizing repeatedly to different guessed dimensions.
- Keep aspect ratio locked unless you have a specific reason not to. As covered above, unlocking it almost always produces a visibly distorted result unless your target dimensions happen to share the source image's exact proportions.
- Understand that enlarging has a quality ceiling. If you need a small image to look sharp at a significantly larger size, that's an AI upscaling task, not a resizing one - knowing this distinction before you start saves a repeat trip through the wrong tool.
- Resize before compressing, not the reverse, when doing both. Bringing dimensions down to what's actually needed first, then compressing the correctly-sized result, generally produces a better outcome than compressing an oversized image and then resizing it.
- For batch jobs, decide between percentage and exact-pixel targeting deliberately, based on whether you need proportional consistency or uniform final dimensions across a set of images with varying original sizes.
Understanding Pixels: What "Resizing" Is Actually Changing
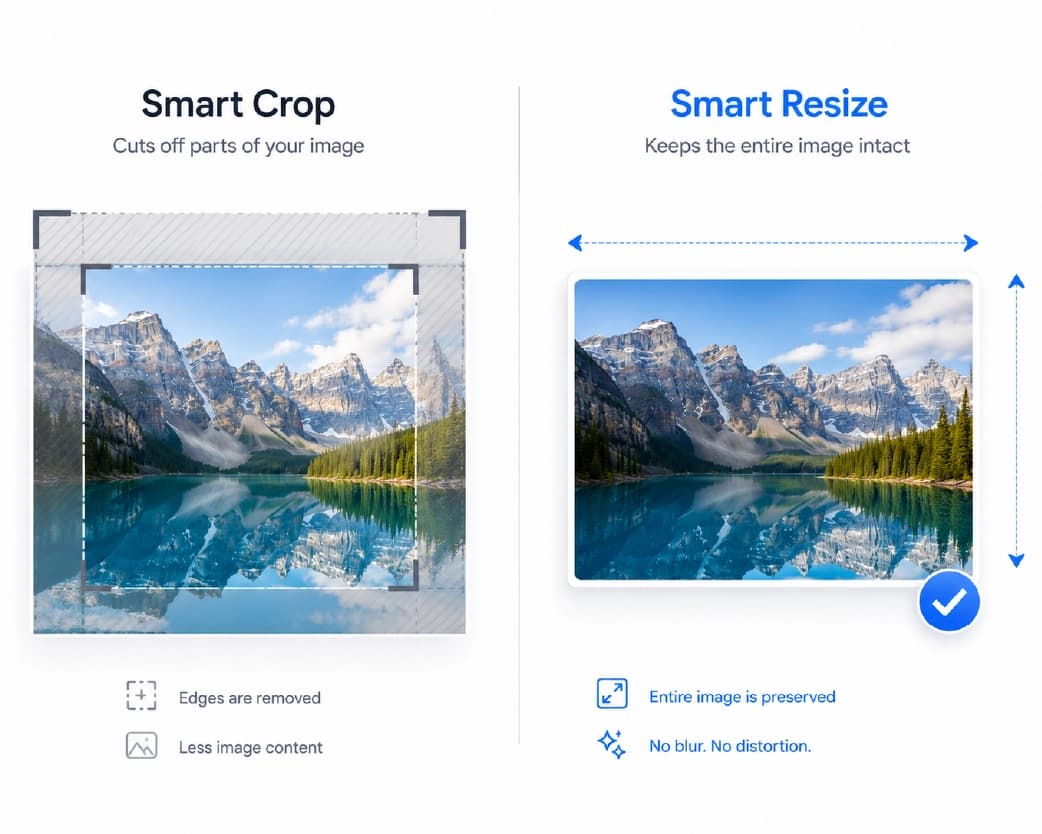
It helps to understand what a pixel dimension actually represents. An image described as 1920×1080 has exactly that many individual colored dots (pixels) arranged in a grid - 1920 across, 1080 down, just over 2 million pixels total. Resizing to 960×540 doesn't crop anything out; it recalculates the color values for a smaller grid (roughly 518,000 pixels) based on the original image's content, which is why the image still shows the same full scene, just represented with fewer total pixels. This is different from cropping, which removes part of the image's actual content to change its dimensions rather than recalculating pixel values across the whole frame - a common point of confusion, since both operations change an image's final dimensions but do so in fundamentally different ways.
This also explains why shrinking is safe and enlarging isn't symmetric: going from more pixels to fewer just means averaging existing detail down into a smaller grid, which every pixel in the new, smaller image has real source data behind it. Going from fewer pixels to more means the tool has to invent values for grid positions that didn't exist in the original at all - which is either done through simple interpolation (guessing based on nearby original pixels, the traditional resize approach) or through AI reconstruction (generating plausible new detail based on learned patterns, the upscaling approach) - two different strategies for solving the same fundamental gap, with meaningfully different results.
Resizing Multiple Times: Does It Compound Quality Loss?
Resizing an image down, then down again later, generally doesn't cause meaningful additional quality loss beyond what a single resize to that same final size would have caused - the pixel recalculation itself doesn't inherently degrade quality the way repeated lossy compression does. However, if each resize step also involves re-saving through a lossy format like JPG, that repeated lossy re-encoding (not the dimension changes themselves) is what accumulates visible quality loss over multiple rounds.
The practical takeaway: if you know you'll need an image at several different sizes over time, resizing from the original source each time, rather than resizing an already-resized copy repeatedly, avoids any risk of compounding quality loss from the format re-saving that often happens alongside each resize.
A Practical Walkthrough: Preparing One Photo for Several Platforms
To make the earlier guidance more concrete: imagine a single product photo, shot at full camera resolution, that needs to go out as an Instagram square post, a website product listing image, and an email to a wholesale buyer, all from the same source file. The practical approach: start from the original, unresized file each time rather than resizing a previously-resized copy, to avoid any compounding quality loss from repeated saves. For Instagram, use the 1080×1080 square preset, likely requiring a crop first if the original photo isn't already square, since forcing a non-square photo into square dimensions without cropping would distort it. For the website listing, resize to whatever exact dimensions the storefront platform specifies, keeping aspect ratio locked. For the wholesale email, a percentage-based reduction (bringing a large original down by 60-70%, for instance) is usually sufficient without needing an exact pixel target, since the goal there is just a reasonably sized attachment rather than a specific display dimension. Three different outputs, three different approaches, all starting from the same original - which is the general pattern worth applying to most real resizing needs: match the resize method to what the specific destination actually requires, rather than using one approach for everything.
Frequently Asked Questions
Is it free to resize images online?
Yes - Plainscan's resizer works without cost for everyday use, processing images directly in the browser rather than requiring an account or upload.
Will resizing an image reduce its quality?
Shrinking an image down generally doesn't reduce visible quality, since there's more source detail than the smaller size needs. Enlarging an image has a real quality ceiling - standard resizing can't add detail that wasn't in the original, so significant enlargement introduces blur. This is where upscaling through AI technology becomes useful.
What distinguishes resizing from compression when it comes to an image?
Resizing alters pixel dimensions (width and height), while compression reduces file size through data encoding more efficiently, without necessarily changing dimensions at all. If your goal is hitting a specific KB or MB file size, compression is the more direct tool; if your goal is a specific width and height, resizing is.
What should I do to adjust my picture on Instagram without any weird cropping?
Select the right preset dimensions based on the type of post you are creating – Instagram Square (1080×1080) or Instagram Portrait (1080×1350) - rather than guessing at \"close enough\" dimensions, which is what typically causes Instagram's own cropping to land somewhere unexpected.
Can I resize many images at once?
Yes - batch resizing applies the same target dimensions or percentage across an entire folder of resized images in one go instead of resizing each one separately.
Why is my image stretched after resizing?
It will happen because the aspect ratio was not locked while the image was being resized and that the dimensions are not the same proportional relationship as the original. Keeping aspect ratio locked (the default in most resizers) prevents this.
Can I resize an image to an exact file size, like 100KB?
Not directly through resizing alone - resizing controls pixel dimensions, not file size specifically. To hit an exact KB target, compression is the more direct tool, often used after resizing an image to reasonable dimensions first.
Is it safe to resize sensitive images online?
Plainscan's resizer processes images directly in your browser rather than uploading them to a server, which means the file doesn't leave your device during the resize - a meaningfully different and more private approach than server-based tools.
What's the right image size for a passport photo?
Passport and ID photo requirements are specific and vary by country and document type, covering both exact pixel dimensions and background color. A dedicated passport photo tool is generally more reliable for this than a general resize tool, since it handles both requirements together.
Can I resize an image to make it bigger without it looking blurry?
Standard resizing has a real limit here - it can't invent detail that wasn't in the original file, so significant enlargement introduces visible softness. AI upscaling is built specifically to handle this and is the proper choice when a more refined and larger outcome is desired.
How does resizing differ from cropping?
Resizing involves reprocessing the pixel grid of the image to a new size while retaining the whole of the original image, just represented with more or fewer pixels. Cropping removes part of the image's actual content to change its dimensions. Both change an image's final size, but through fundamentally different operations.
Does resizing an image multiple times over time degrade its quality?
The dimension changes themselves generally don't compound quality loss. What can accumulate quality loss is repeated saving through a lossy format like JPG alongside each resize - working from the original source file each time, rather than resizing an already resized version repeatedly, prevents this.
Can I resize a WebP image like I would do with a JPG or PNG image?
Yes – resizing WebP works similarly to JPG or PNG images depending on whether the specific file uses lossy or lossless encoding. The core dimension-change math works identically across formats.
Why does my resized screenshot have blurry text?
Screenshots contain fine text and sharp interface elements, which are more sensitive to size reduction than typical photographic content - shrinking too aggressively can make small text illegible. Checking readability at the actual target size, rather than assuming a percentage that works for photos will work equally well for text-heavy images, avoids this.
Is there a maximum size I can resize an image to?
Practical limits depend on the specific tool rather than resizing as a concept - very large target dimensions may take longer to process or hit a tool-specific ceiling. For most everyday needs (social media, web, print-appropriate sizes), this isn't a practical concern.
Do I need an account to resize images on Plainscan?
No - since the resizer processes images directly in your browser rather than uploading them to a server, everyday resizing doesn't require an account.
Can I resize an image and change its format at the same time?
Depends on the tool - some resizers only adjust dimensions and keep the original format, while others let you export to a different format (JPG, PNG, WebP) as part of the same step. If your tool only handles dimensions, a separate format conversion step afterward achieves the same combined result.
Should I resize the same source image differently for different platforms?
Yes, generally - different destinations (a square Instagram post, a wide website banner, an email attachment) often call for different exact dimensions or approaches. Working from the same original source file for each, rather than resizing an already-resized copy repeatedly, gives the cleanest result for every version.
Can I undo a resize if I need the original dimensions back?
Not from the resized file itself - resizing produces a new file, so keeping the original unresized image available is the practical way to \"undo\" a resize, by simply starting over from that original rather than trying to reverse the process on the resized copy.
Does the resizer support HEIC files from iPhone?
Support varies by tool - if a resizer doesn't accept HEIC directly, converting to JPG first (a common built-in export option on iPhone) resolves this before resizing.
What happens if I enter dimensions that don't match my image's aspect ratio while it's locked?
With aspect ratio locked, entering one dimension automatically adjusts the other proportionally, so you can't accidentally force mismatched dimensions - the tool calculates the correct paired value for you rather than letting the two numbers conflict with each other.
Is resizing an image different from changing its resolution?
They're closely related but described differently - \"resolution\" often refers to the total pixel dimensions (like 1920×1080), which is exactly what resizing changes. Some contexts also use \"resolution\" to mean pixel density relative to a physical size (DPI/PPI, relevant mainly for printing), which resizing pixel dimensions affects only indirectly, since DPI is calculated from both pixel count and the intended physical output size together.
Conclusion
Resizing is a simple, precise operation - change an image's pixel dimensions, keep the aspect ratio locked, and the result looks exactly like the original at a different size, as long as you're shrinking rather than dramatically enlarging. Where people most often go wrong is expecting resizing to solve a problem it isn't built for: hitting a specific file size (that's compression) or making a small image look sharp at a much larger size (that's AI upscaling). Knowing which of the three you actually need is most of the battle. For the overwhelming vast majority of everyday needs - social posts, website images, email attachments, form uploads - resizing to the correct dimensions with aspect ratio locked, using a preset where one's readily available, covers the task cleanly in well under a minute per image, with no software to install and no file ever having to leave your device in the process. Plainscan's image resizer handles exact-pixel and percentage resizing directly in your browser, with social media presets built in and batch support for resizing an entire folder at once - no upload, no software installation, and no account required for everyday use.
Related insights
Get the Plainscan App for iOS & Android